


Making a photo album can seem like quite a daunting process but I promise a) it's so much easier than you think - like all these type of tasks are! b) it's actually a really enjoyable thing to do
The first thing to do is amalgamate all your photos. If you're doing a 'Happy 50th Birthday' photo album then you are going to have a mix of old photos already printed out and new photos on your phone. Photos that you have, photos from friends and family!
Lets start with your photos first. For the old photos printed out that you own, that's great, just put in a pile. For the photos that are on your phone, make a new folder/album and transfer them all across.
Then contact friends and family and get them to whats app you all the photos they have and put them into the new folder/album on your phone. If they have old printed out photos then the easiest thing is to get them to take photos of them with their phones and whats app them over ( honestly, photo quality in the 90s/00s was so bad that it won't make a difference!)
Now go through all the photos in this new folder/album selecting the ones you want to feature in the photo album. It's your choice so don't get too het up about being political. The, open a 'photo printing' app on your phone ( I always use free prints but there are lots out there ) and start selecting the photos you want them to print out and send to you. Honestly, its really reasonable ( we're talking free for most of the prints, a small postage fee and a small amount extra if you want to upgrade to a larger size to mix it up ) and they take just a few days to arrive.
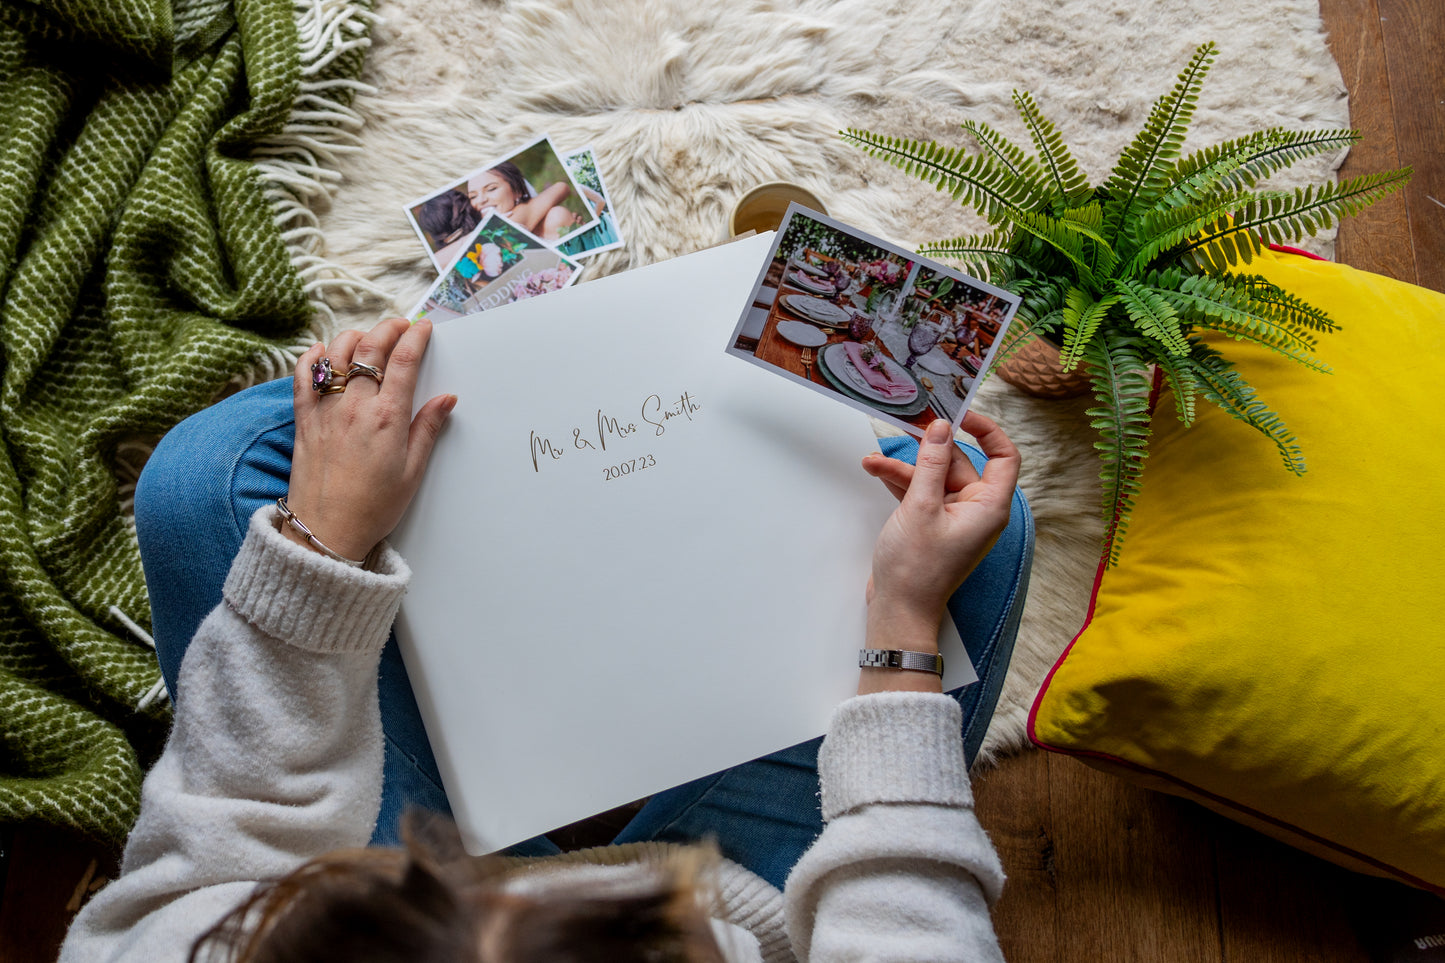
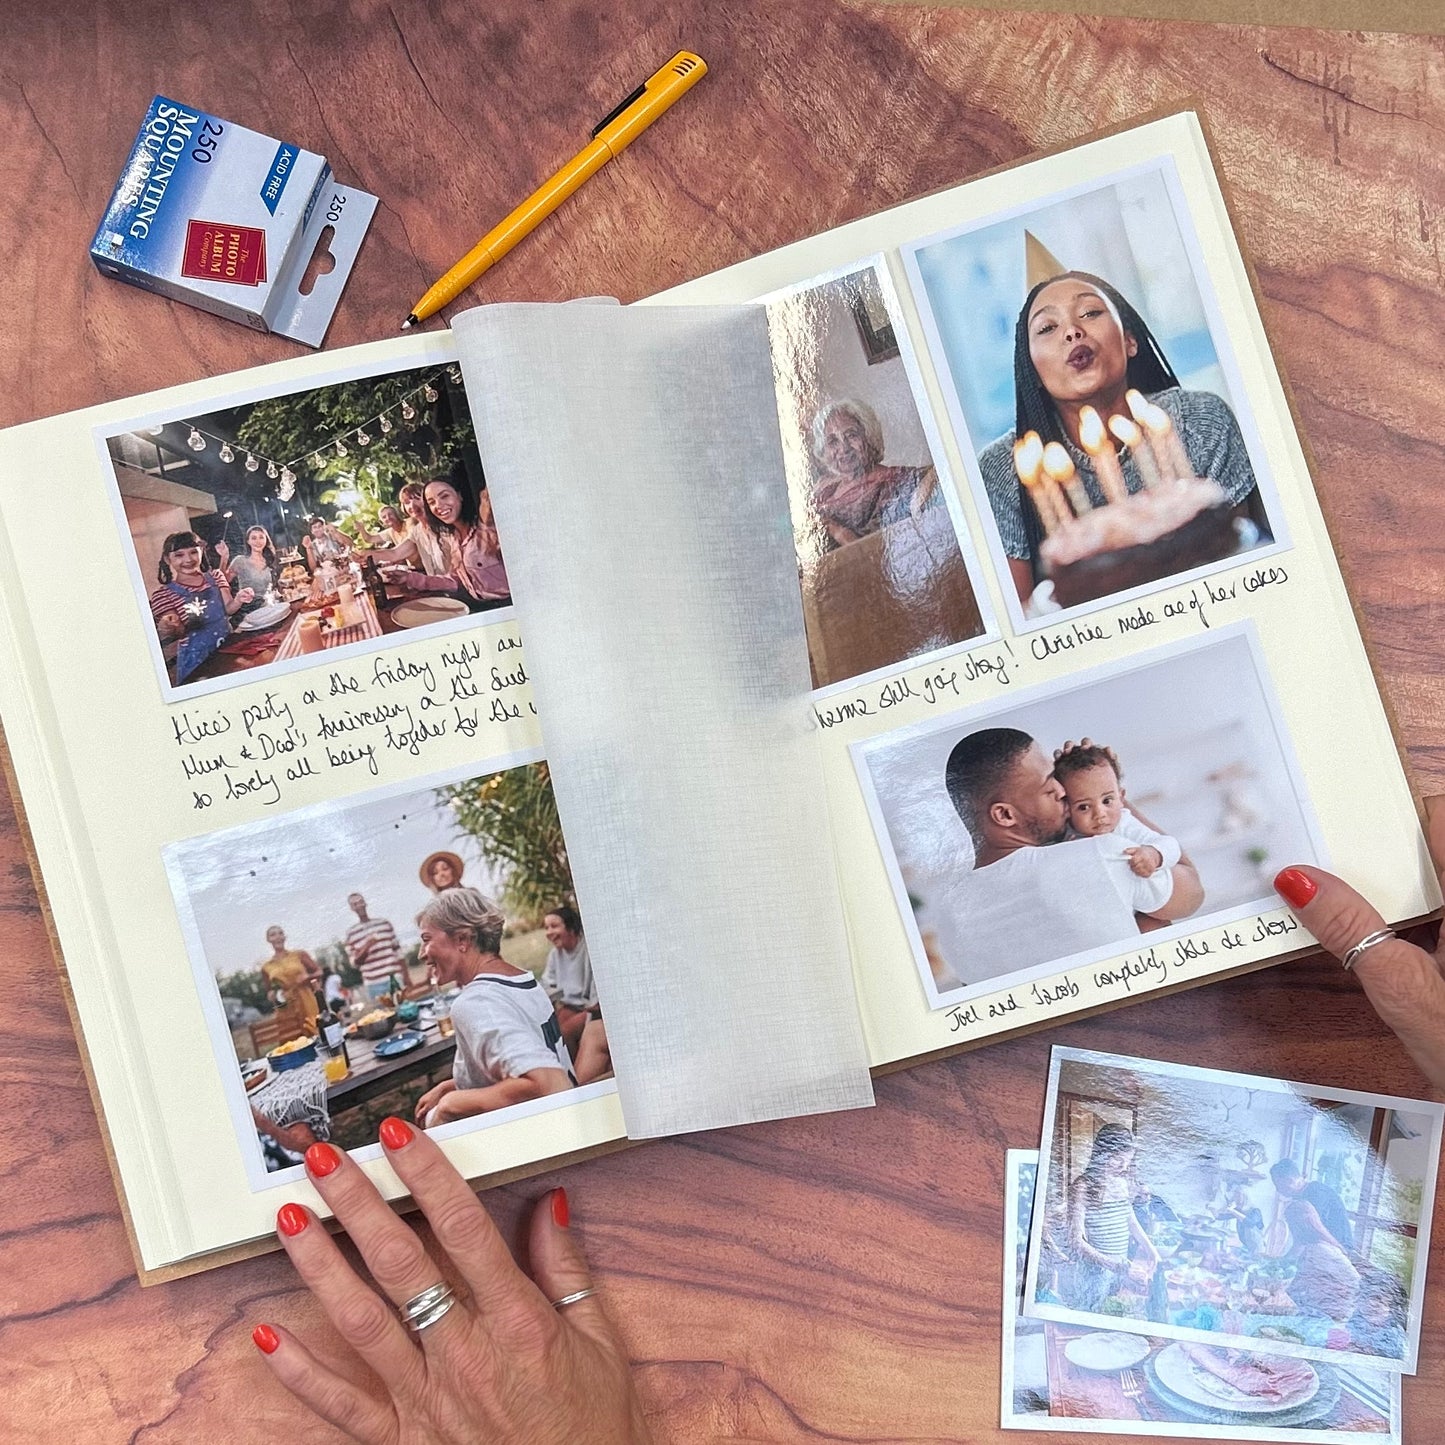
When they arrive add them to the pile of printed photos you already have and start the task of laying them out in the book. The size you go for and the orientation will make a big difference as to how they look on the page. Mix it up a bit have some landscape, some portrait, some 4" x 6" some larger.
When you have decided where they are all going to go and which ones are making the cut you just need to secure them in place. We use photo mounts ( tiny self adhesive squares that go on the back of the photos) but you can use glue, magic tape, washi tape, photo corners - whatever works.
Also, a bit of commentary is a good touch so do feel free to write on the pages with felt tip, roller ball, biro. You'll be terrified the first time you do it but this passes!
Honestly, when you've filled an album it's the best feeling as a) it is a work of art b) you know you're going to make lots of other people very happy as everyone loves seeing old photos of themselves c) you will get loads of bonus points for being so thoughtful!!